St. Mary Campground Map at Glacier, Montana

St. Mary Campground Map at Glacier
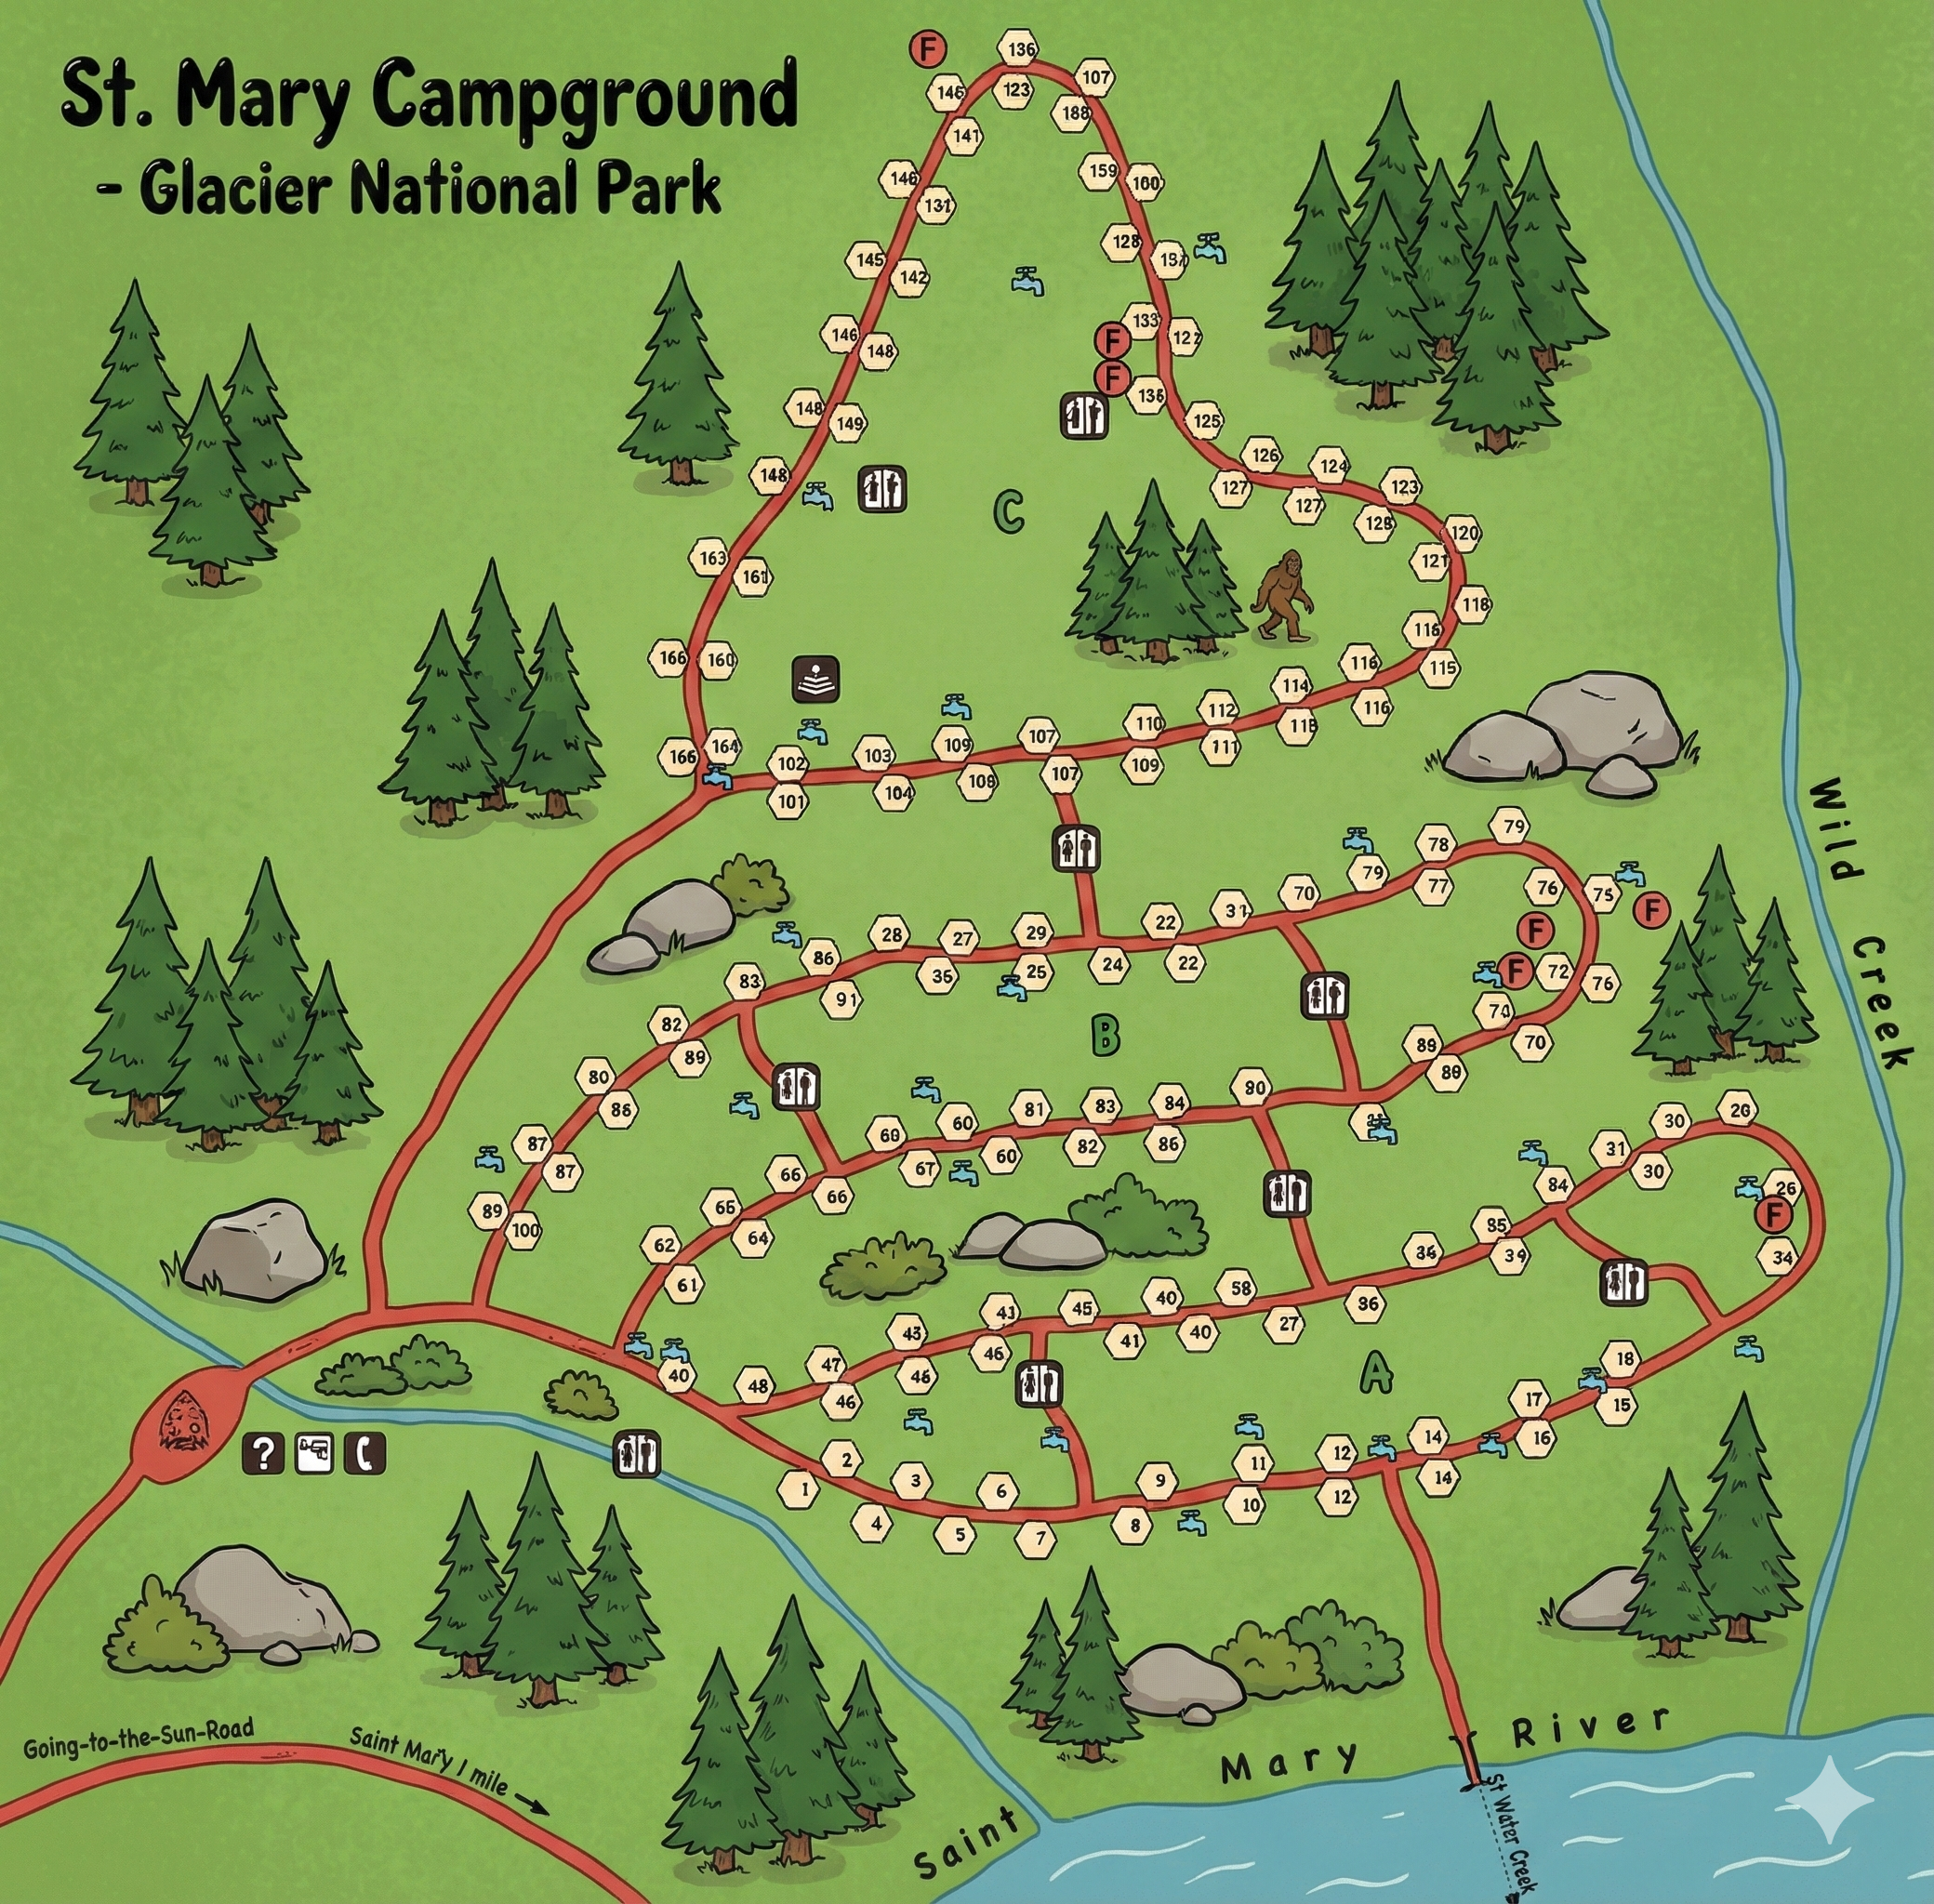
St. Mary Campground Map Overview
The map shows St. Mary Campground tucked between the St. Mary River (along the bottom edge) and Wild Creek on the right. Campsites are arranged in three main loops labeled A, B, and C, with a handful of smaller spurs and pockets labeled F. Each site is numbered inside a small hexagon, and black icons mark restrooms, water, and the dump station.
The entrance comes off the Going-to-the-Sun Road near the bottom left corner of the map, close to the campground kiosk and a star symbol marking the entrance.
Loop Layout: A, B, C and the F Spurs
From south to north (bottom to top on the map), the loops climb away from the river:
- Loop A: Lowest loop, closest to the St. Mary River. Sites A1–A25 (approximate range) form a long curve that parallels the riverbank, with a restroom icon toward the middle of the loop.
- Loop B: The middle band of sites, above A. B-sites run roughly 30–90 along a slightly longer figure-eight of road, with restrooms and water scattered through the center.
- Loop C: The upper loop, labeled “C” in green on the map. C-sites stretch from around 100–150 in a large triangle-shaped loop. A restroom cluster and the dump-station icon sit near the bottom of this loop where it ties into B.
- F pockets: Several small clusters labeled “F” sit off the side of the main loops—one near the upper end of C and others along the right edge near Wild Creek. These are smaller spurs or short side roads with only a handful of sites each.
All loops are simple one-way or low-speed spurs: you enter from a junction with the main loop road, follow the arc of numbered sites, and rejoin the same junction when you exit.
Facilities & Icons on the St. Mary Map
The legend for this map isn’t printed on the image, but the symbols are standard for Glacier:
- Restrooms: Bold black restroom icons placed in each main loop so you’re never far from a facility.
- Water spigots: Small blue faucet icons dotted between sites all through loops A, B, and C.
- Dump station: A black tank/pump icon at the junction between B and C loops, serving RVs in the whole campground.
- Entrance services: Near the star at the entrance you’ll see icons for information, possibly phones, and basic services.
When you’re choosing sites from the map, look for the combination of number range plus nearby restrooms and water taps, especially if you want a shorter nighttime walk.
Rivers, Roads & Orientation
The campground road branches off the Going-to-the-Sun Road just west of the St. Mary River Bridge and loops through A, then B, then C as it climbs away from the river. The bottom edge of the map traces the St. Mary River, while Wild Creek flows down the right side.
If you want to be closer to the river, focus on sites in lower A and the lower half of B. For quieter sites away from the main road, look higher in C loop and the upper F pockets toward the top of the map.
St. Mary Campground Map FAQ
What loops are shown on the St. Mary map?
The map labels three main loops—A, B, and C—plus several smaller spurs and pockets labeled F along the upper and right edges.
Does the map show water and restrooms?
Yes. Black restroom icons are placed in each loop, and blue water faucet symbols are scattered between sites throughout the
campground.
Where is the dump station?
The dump-station icon sits near the junction between B and C loops, roughly in the center of the campground.
How close is the campground to Going-to-the-Sun Road and the river?
The entrance comes directly off Going-to-the-Sun Road, and Loop A hugs the St. Mary River along the lower edge of the map, with
loops B and C stacked above it.